Overview
Traditionally, young Inuit (both men and women) learned to build igloo by observing, imitating and practicing. It would start at very young age, under the supervision of an adult who could correct, advise and guide him. After learning, in this lesson, about different types of snow, how to use the tools, what are the steps of igloo building and what are the building techniques, it is time to experiment. In fact, the best way to learn to build an igloo is to practice, practice, practice.
Igloo building unit
This lesson is part of an igloo building unit composed of the following 6 lessons.
Learning Outcomes
In this lesson, students will go on the land put their knowledge to practice. They will then find a proper location to build an igloo by discussing geography and by identifying proper snow to cut blocks. They will use the tools to practice tracing the foundation of the igloo and opening-up snow. This lesson can start by a demonstration by the teacher, then a practice session for students.
At the end of this lesson, students will
- Have identified a proper area to build an igloo;
- have touched and feel these different types of snow;
- have found good snow for igloo building;
- have seen and experimented snow block extraction using the tools;
- have traced an igloo foundation.
Flow
1. Area Identification
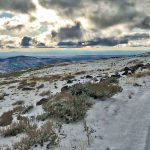
Take your students on the land. Depending on their level, guide them to a good area for igloo building or let them determine this area. A good area to build an igloo is determined by geography and type of snow.
Good areas
- On a gentle slope. This way, thicker blocks can be extracted as you move towards the top of the slope.
- In an area where the snow has the right density to cut blocks (sitilluqaq or pukajaq).
Areas to avoid
- On the border of a lake. Water might seep through the snow and flood your igloo or freeze your gear.
- In a small valley or ditch. A blizzard will push the snow in it and burry your igloo.
- Close to a cliff. The risk of avalanche or snow slide on your igloo is high.
- On top of a hill. It is too exposed to the wind and will, with time, create holes between the blocks of your igloo.
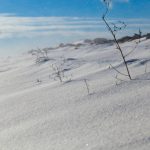
Snow identification is a skill that develops over a lifetime. Each time you go out with your students, encourage them to touch, cut through and observe the different types of snow.
2. Demonstration
Demonstrate what students have learned in the previous theoretical lesson. Show to draw an igloo foundation, open-up the snow and extract blocks. If you have enough time, build an igloo to make a demonstration for students. Otherwise, build an uquutaq, using the blocks you extracted.
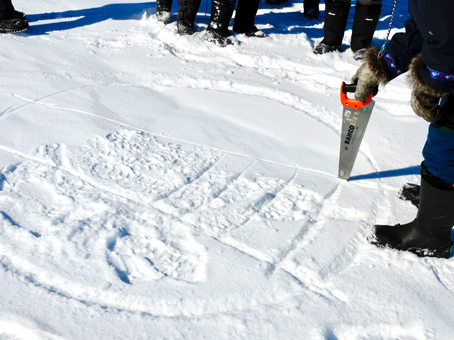
The teacher is tracing the foundation of the igloo and showing where the snow will be opened by tracing two lines across the circle. These lines must be wider at the point where you stand in order to be able to extract the blocks towards you.
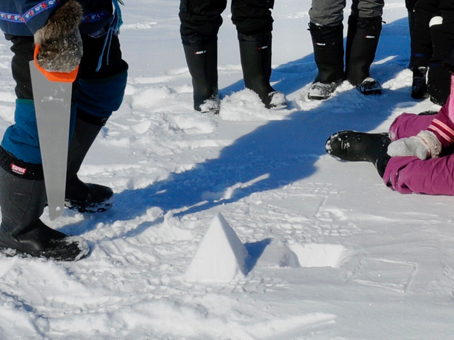
The teacher is using pyramid to explain a basic principle of snow blocks cutting. If the blocks are wider at the base than on the surface, you will not be able to extract them without breaking the snow around.
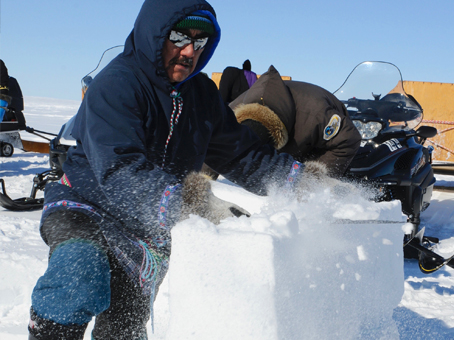
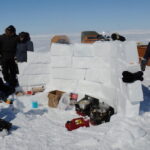
After extracting a few actual size and shape blocks, the teacher is building an uquutaq to shield from the wind. Tea will be made behind this wall. If you have more time, you can build a small igloo around the foundations you traced.
“It’s so easy and simple when we explain but as soon as you turn your back on it, it is blinded and complex.”
Nellie Nastapoka
If you need to review these concepts, refer to the theoretical lesson on igloo building.
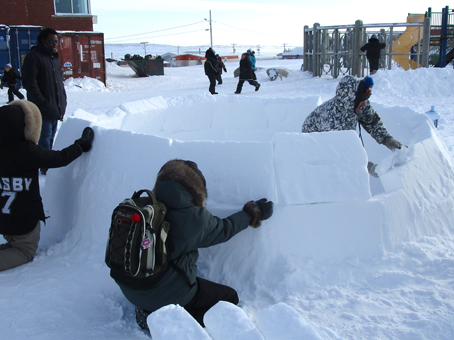
3. Experimentation
Let your students experiment snow blocks extraction, providing them with advice or giving them challenges according to their level. Once they can extract blocks, they should trace an igloo foundation and practice opening up the snow and extracting the blocks from inside the footprint.
To trace a circular footprint, students can use a rope, attached to an unak. Stick the unak in the snow, determine the desired radius of your igloo and walk around the unak using the rope to trace the foundation.