When it comes to factual knowledge, neuroscientists have clearly identified retrieval practice as one of the most effective learning strategies. While learning often occurs from the outside in (reading, listening, observing, etc.), retrieval practice relies on bringing information from the inside out. Retrieval, the action of “deliberately recalling information” can easily be supported by the use of flashcards, which prompt students to retrieve what they know on a topic. However, for this method to be effective, it is critical for students to take the time to fully form their thought before looking at the answer, which doesn’t always happen using conventional flashcards.
In this article, you will learn how to use Microsoft PowerPoint to create a deck of virtual flashcards that can be used for retrieval practice.
Each slide of the PowerPoint will include a question or prompt and will be programmed to give the answer only after a set amount of time, giving students the opportunity to fully form their thoughts. These virtual flashcards decks can be updated throughout the year, allow students to easily create and share their own flashcards, and can become a powerful tool to review or study independently. There are also online tools that allow you to create flashcards, such as CRAM and Quizlet. However, they rely on the Internet connection and often require creating an account to save your work.
Depending on your context, you can either:
- create a deck of virtual flashcards and share it with your students;
- ask students to revisit their notes and create the flashcards themselves;
- mandate each student to create a few flashcards on a topic and assemble them into a collaborative deck for the whole class.
To learn more about retrieval practice, visit https://www.retrievalpractice.org/
🛠️ Tools used: PowerPoint’s Text and Animations tools.
📚 Curricular links: Ideal for reviewing or studying.
📈 Level of difficulty: Intermediate
📄 Template available: Download
Procedure
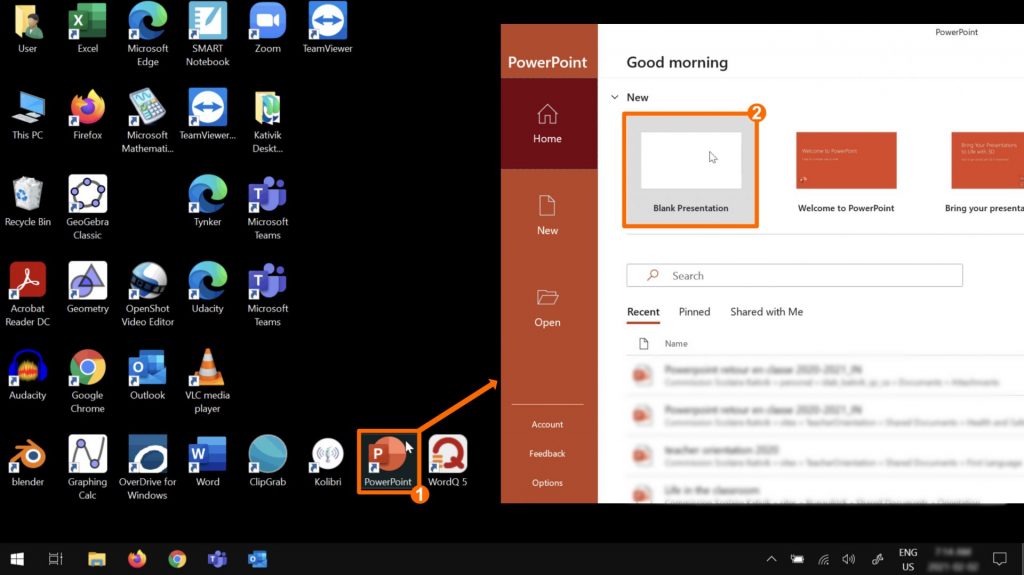
- Double click on the PowerPoint icon on your desktop.
- Double click on Blank Presentation to create a new document.
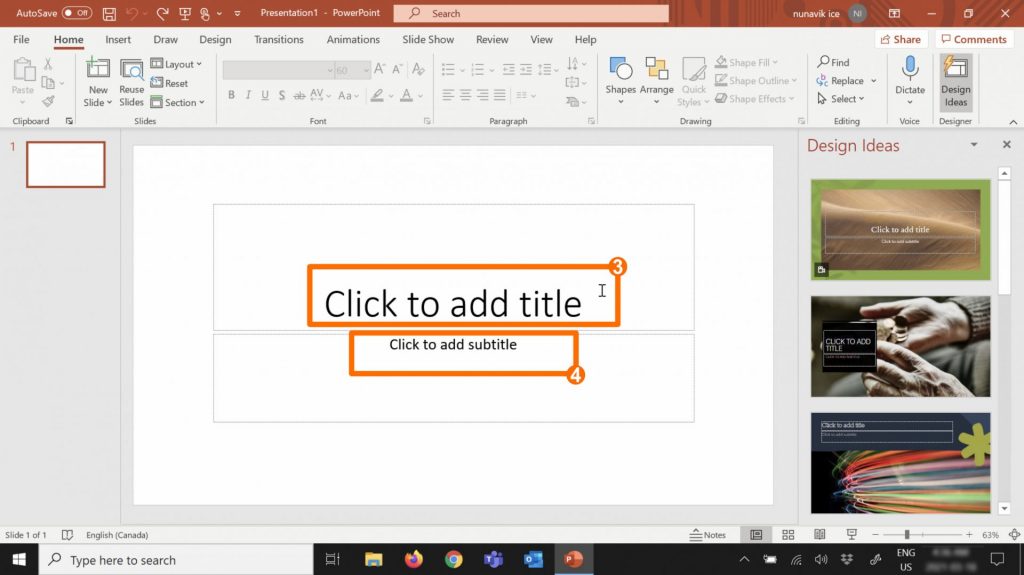
We will be using the default slide layout, which includes a title and a subtitle.
- Click on the title and type your question or prompt.
- Click on the subtitle and type the answer or information to retrieve.
*Possible adaptation: Instead of writing the prompts and answers, they can be recorded and added to each slide as an audio file.
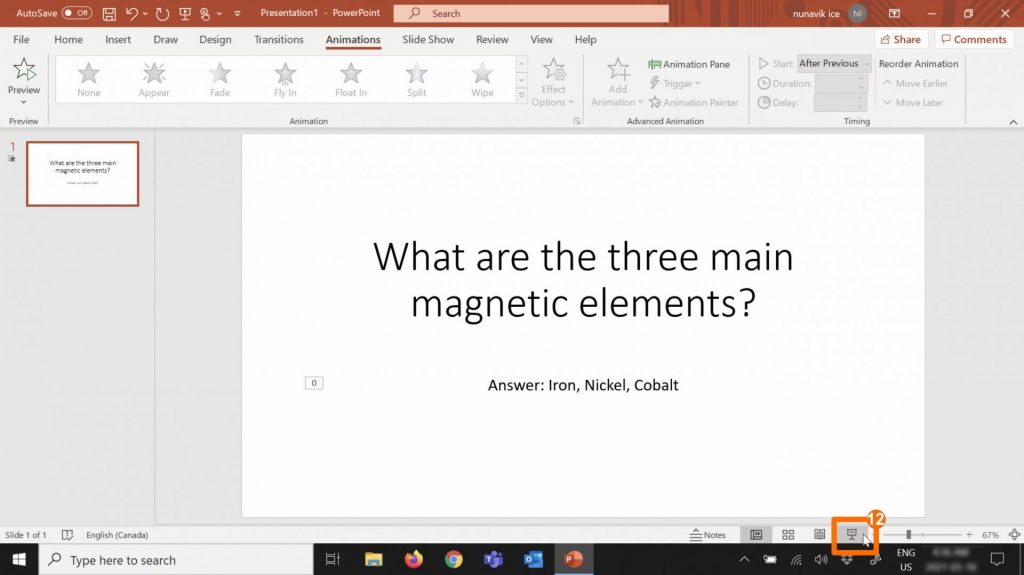
In order to make sure only the question or prompt is visible, we will program the answer to appear only after 10 or 15 seconds. This will give you time to think about the question or prompt and to retrieve the information you know before seeing the answer.
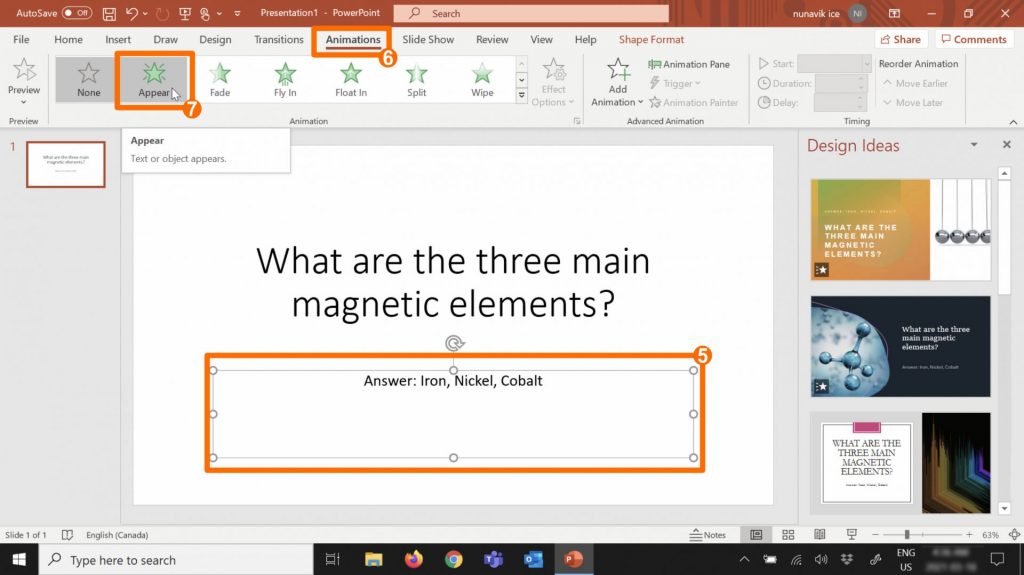
- Select the text zone where the answer is written.
- Click on the Animations tab.
- Select Appear.
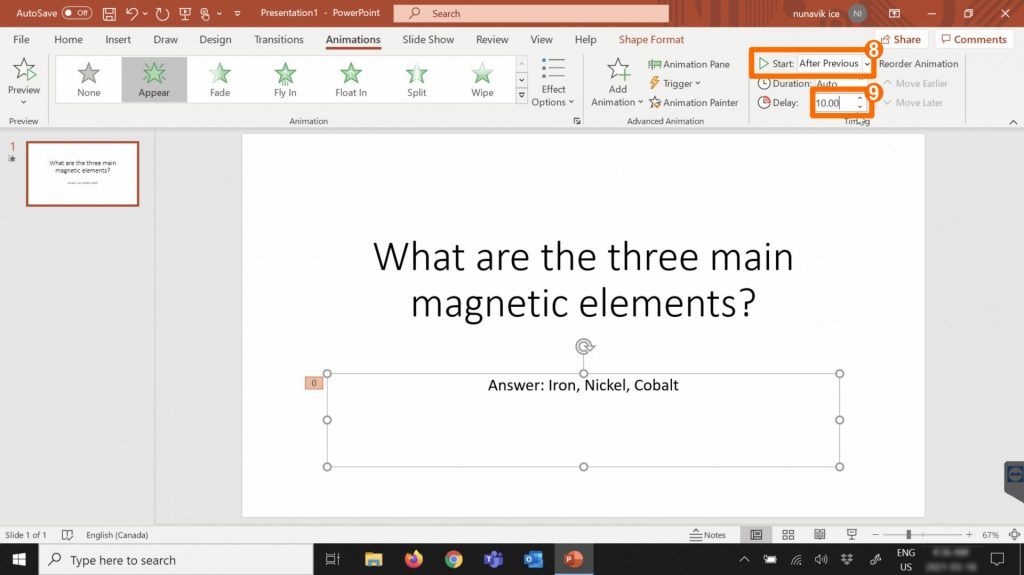
- In the Start options, select After Previous.
- In the Delay zone, adjust how many seconds you want before the answer appears. Depending on the question or prompt and amount of information to retrieve, we suggest 10, 15, 20 seconds.
Retrieval practice is most effective when you really take the time to bring back to mind everything you remember. To help you take this time, we will disable the mouse click in your presentation, forcing you to wait for the answer to appear before moving on to another question.
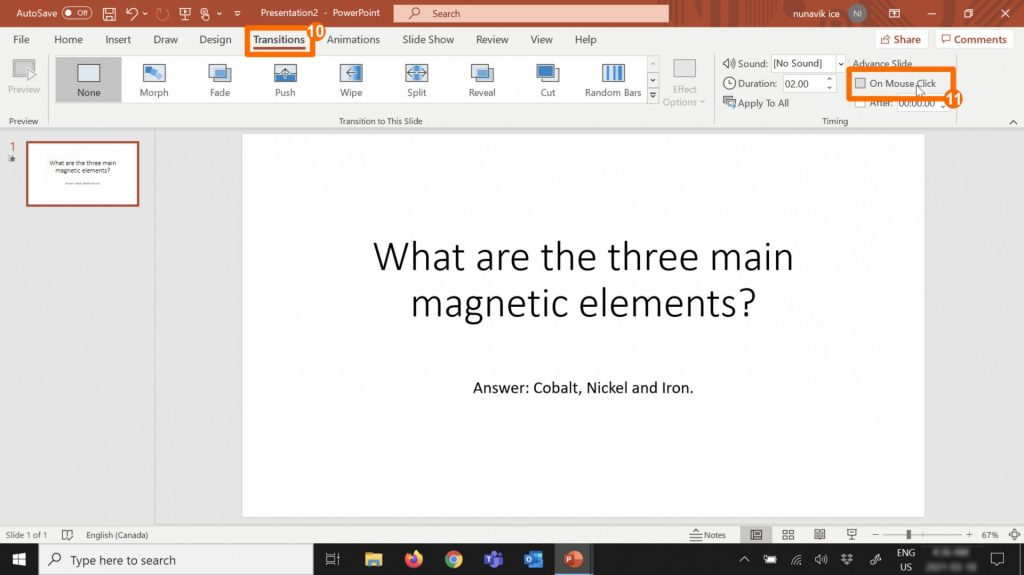
- Click on the Transitions tab.
- Disable the On Mouse Click option by unchecking the box.
Test your digital flashcard(s) by launching the PowerPoint presentation.
- Click on the Slide Show icon in the lower right toolbar.
You should only see your question or prompt at first. After the number of seconds chosen at step 9 has elapsed, the answer should appear. Move to the next slide using the keyboard arrow >.
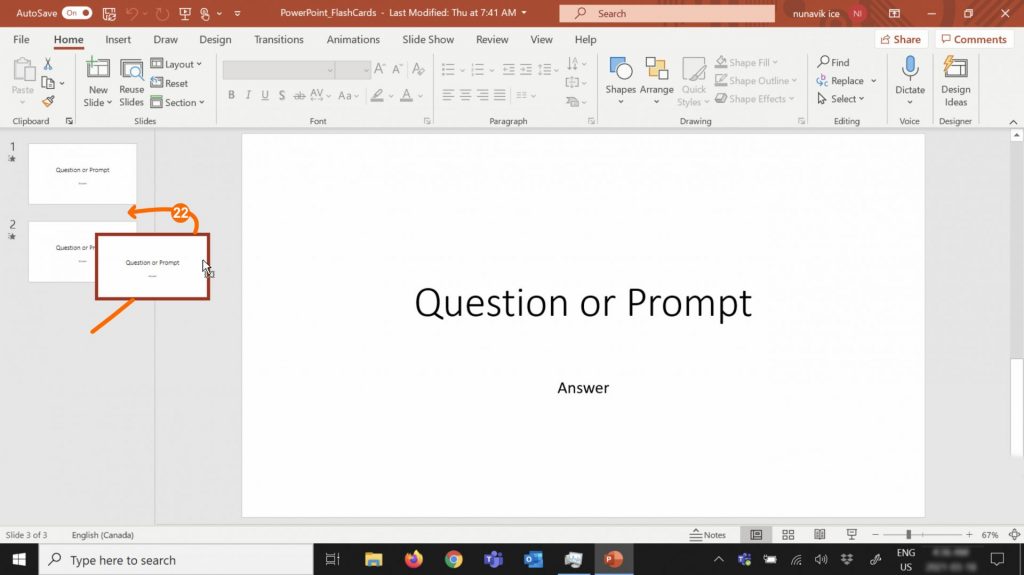
Once your first flash is created, it will be much faster to create more. Simply duplicate the existing slide and change the text. The animations and timing will automatically be applied.
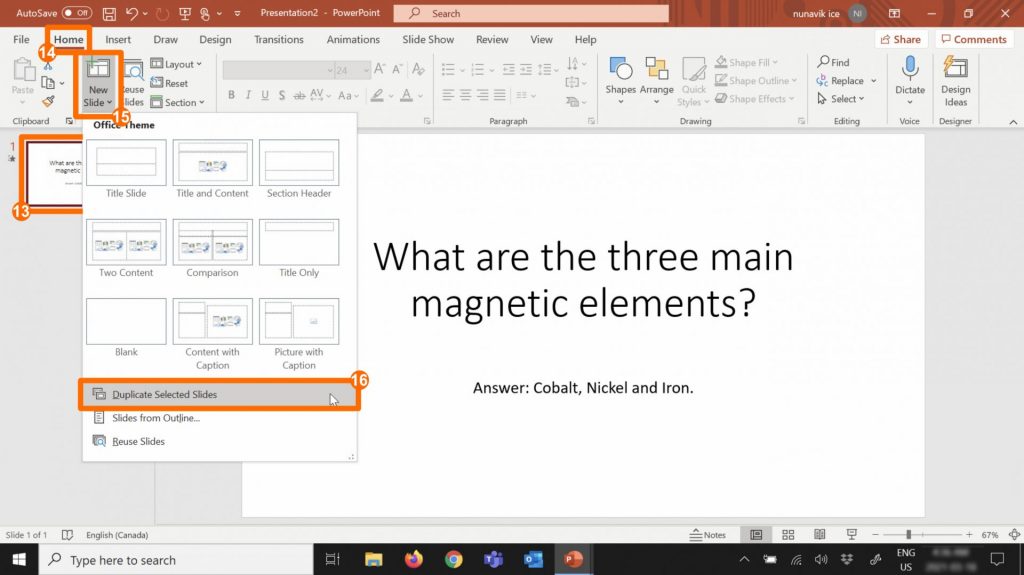
- Select the slide you want to clone.
- Select the Home tab.
- Click on the downward arrow beside the New Slide menu item.
- Click on Duplicate Selected Slides.
Repeat steps 3 and 4 to create a new digital flashcard.
Once in a while, it is important to shuffle your deck of virtual flashcards, so that the questions or prompts don’t appear in the same order.
To shuffle the deck, you will have to change the order of your slides.
- Click and hold on a slide thumbnail. Drag it up or down to its new position. Release your click.
Repeat on at least half your slides and your deck of virtual flashcards will be shuffled.
Save your Project
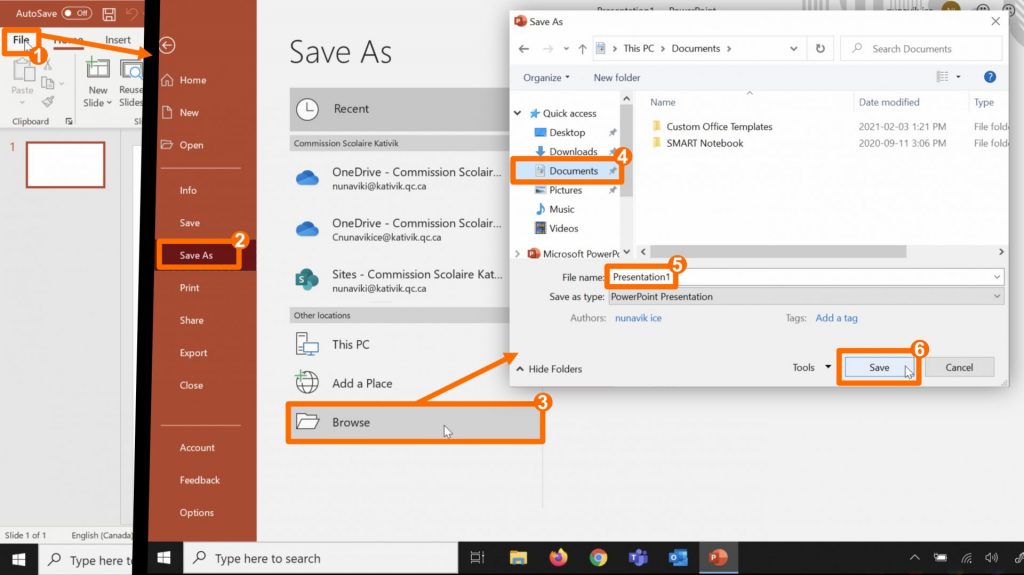
To save your project:
- Click on the File tab.
- Select Save As.
- Click on Browse.
- We suggest saving files under the Documents folder, but you may choose other locations.
- Name your file.
- Click on Save.