This introduction post was prepared to guide you step by step as you become familiar with your new KI student computer.
Identifying your Computer
KI computers come in two configurations; one for students and one for teachers. Before following the instructions in this document, make sure you have the right computer. For this document, you should have a student computer.
Student Computer
How to recognize a student computer? When you land on the Sign in page, you should see the following sessions.

Currently, student computers are DELL Latitude 3410 (for secondary cylcle 2 – includes Antidote and L1-L2 desktop folder) or 5310 (for secondary cycle 1 and primary). This information is visible under your computer.
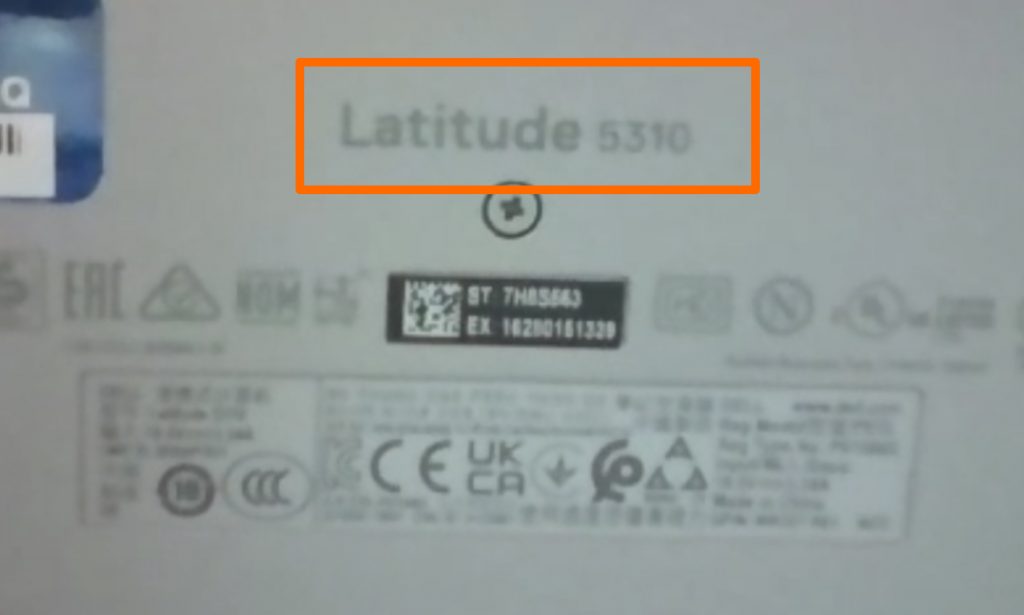
If you have this computer, keep reading this post!
Teacher Computer
How to recognize a teacher computer? When you land on the Sign in page, you should see the following sessions.

Currently, teachers computers are DELL Latitude 5310 – 2 in 1. This information is visible under your computer.
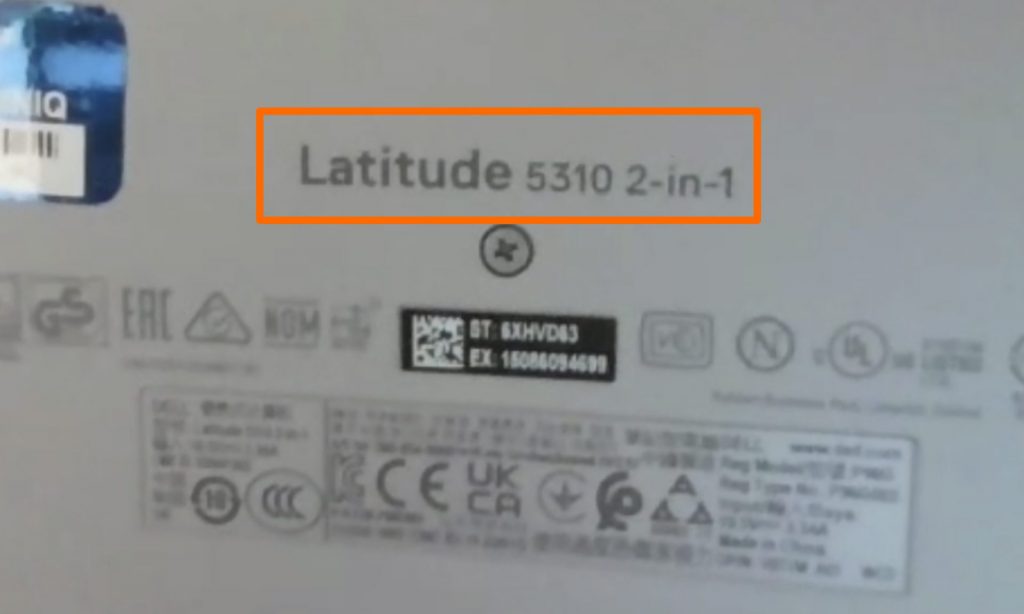
If you have this computer, and you are a teacher, use the KI teacher computer post instead.
Signing In
When you turn your computer ON, it will land on the sessions sign in page. KI computers come in different configurations. Depending on this configuration, the sessions available will vary. As a student, you must use the Student or Étudiant session.
Signing In to the Student or Étudiant session
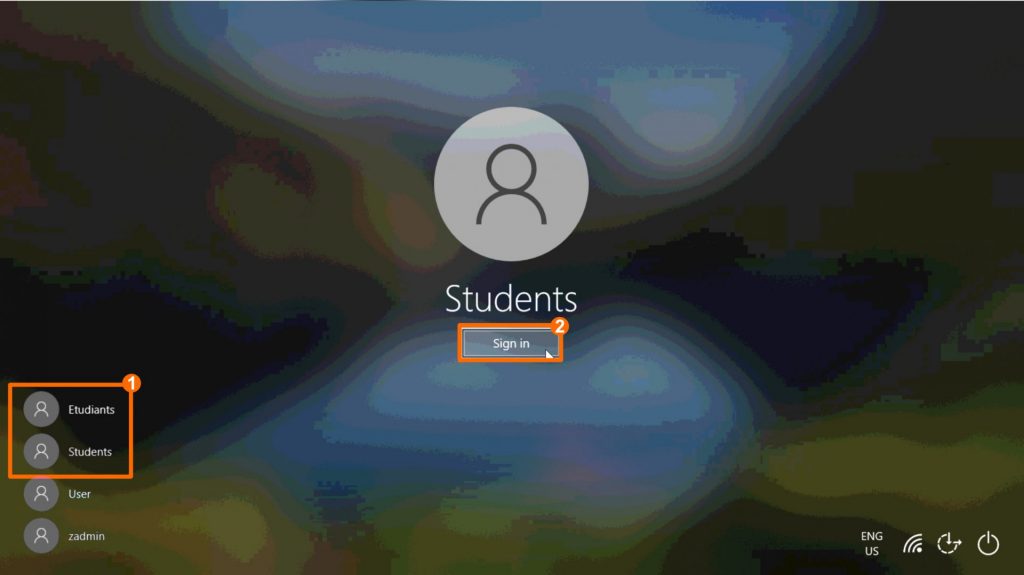
No password is required to sign in to the Student or Étudiant sessions.
- Select the Student or Étudiant session, in the lower left corner of the screen.
- Click on Sign In.
Accessing your school’s Wi-Fi network
The first time you turn your computer ON, it should automatically connect to your school Wi-Fi Internet network. This network should be identified as KI-School.
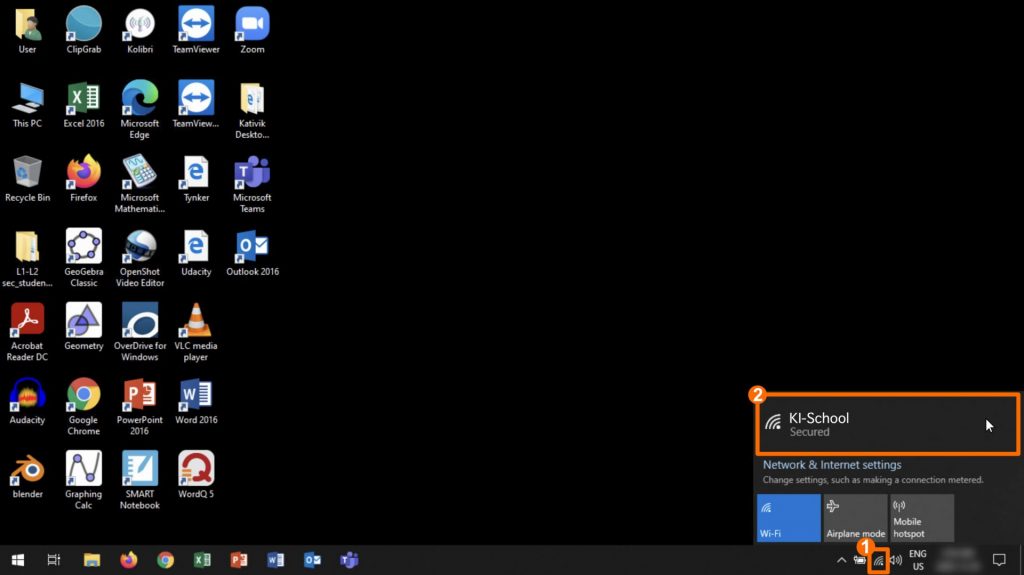
- Click on the Wi-Fi icon, located in the lower right corner of the screen.
- Make sure the selected network is KI-School.
Where to Store your Files?
We suggest storing your files on the computer, in the Documents folder. You might also want to store files on a USB drive as a backup or to share files.
Accessing the Documents folder, where you should store your files
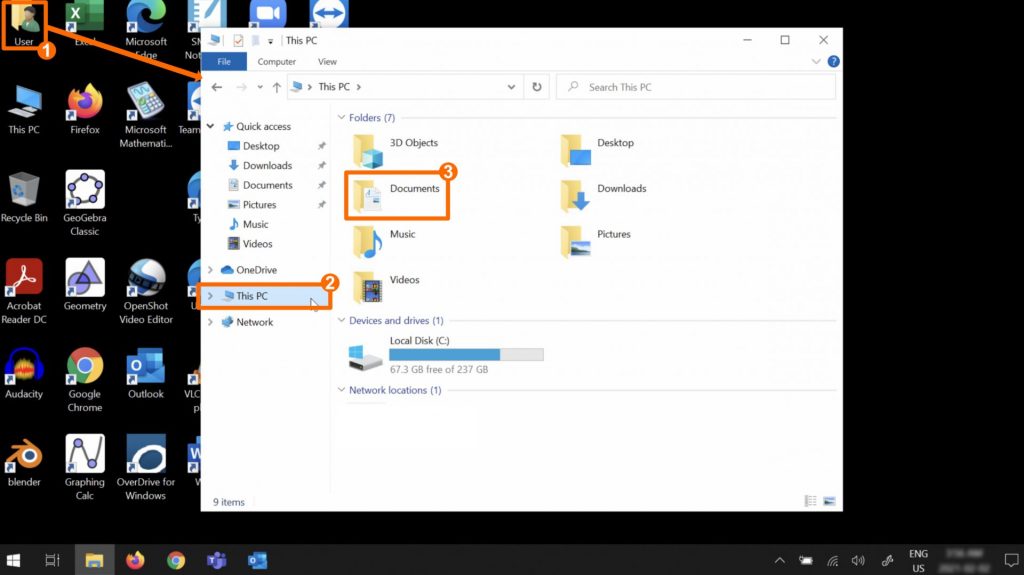
To access the Documents folder:
- Double click on the Student or Étudiant icon on your desktop.
- In the left hand side menu, select This PC.
- Click on Documents.
Storing files on a USB Drive
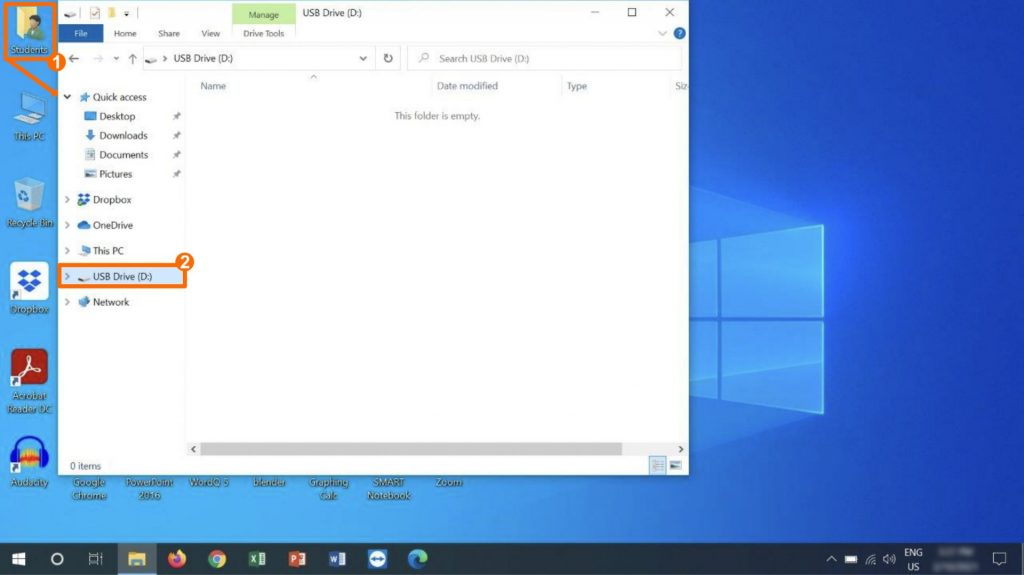
Once a USB Drive is connected to your computer:
- Double click on the Student or Étudiant icon on your desktop.
- In the left hand side menu, select USB Drive (D:).
Copy and paste, save, or drag and drop your files in this location to store them on the USB Drive.
*The files you store in the Documents folder are only accessible through the session you used to sign-in. For example, if you signed in using the Student session and create files, the Étudiant sessions will not allow you to see these files.
Using Microsoft Software
The first time an Office Application is launched on the new KI Computer, the user will be required to activate the Microsoft Office licence. This procedure is performed only once. In order for this activation to be successful, the computer must be connected to the internet. The following steps will guide you through this process. In this example, the user is launching Microsoft Word for the first time.
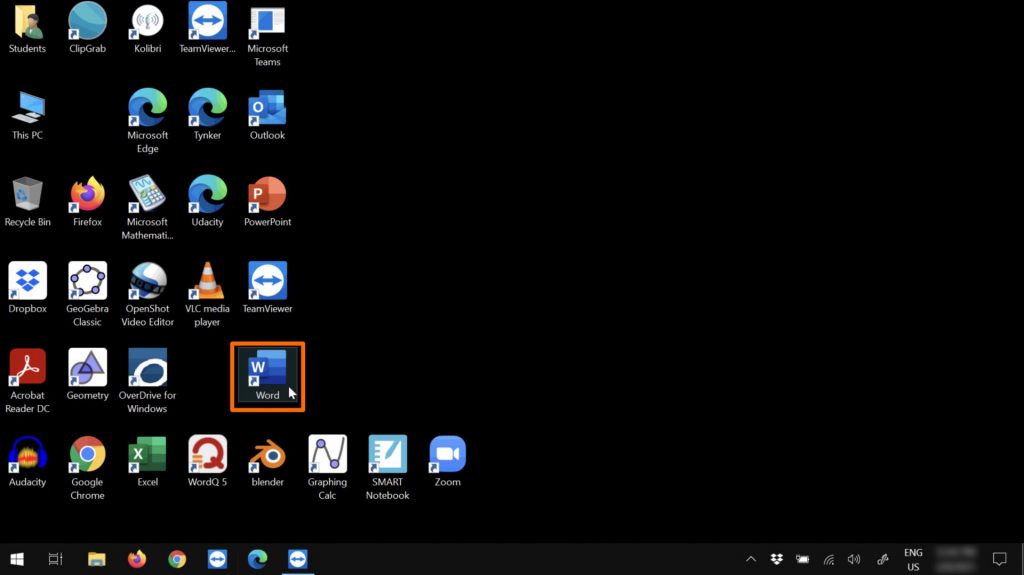
From the desktop, double click on the Word icon.
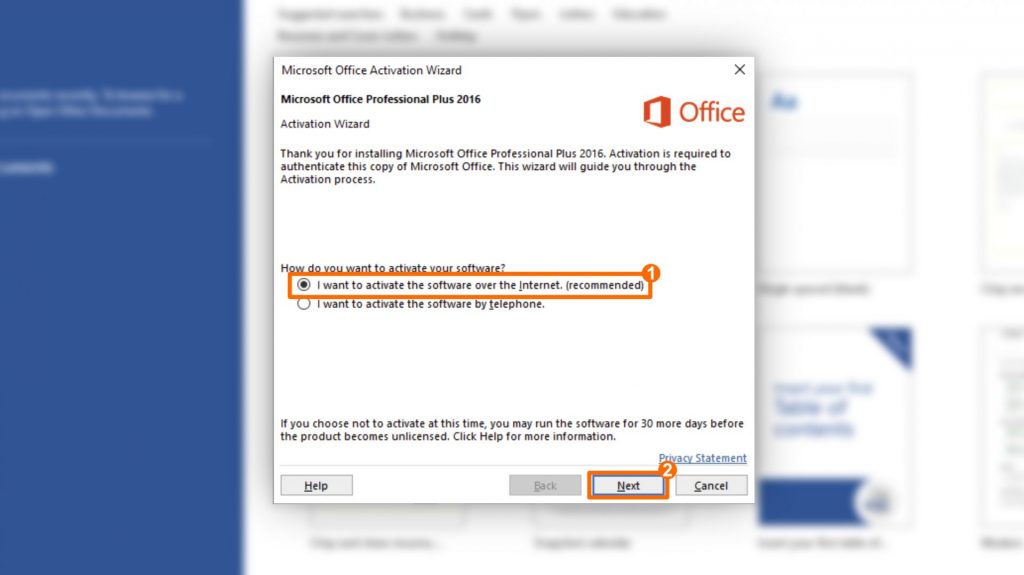
The Microsoft Activation Wizard will be launched automatically.
- Ensure that the following is selected: I want to activate the software over the Internet.
- Click on Next.
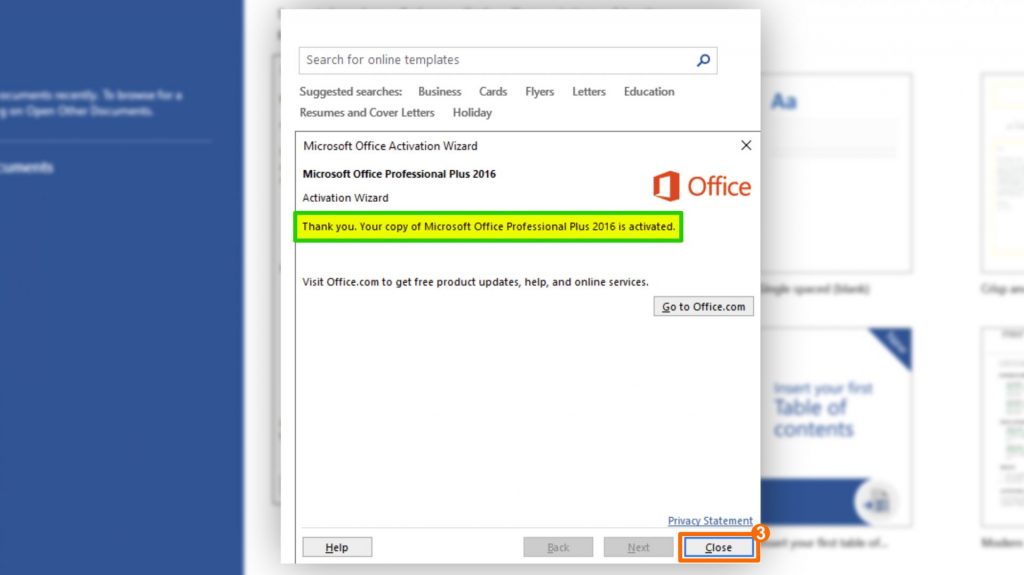
The licence activation is confirmed.
- Complete the activation process by clicking on Close.
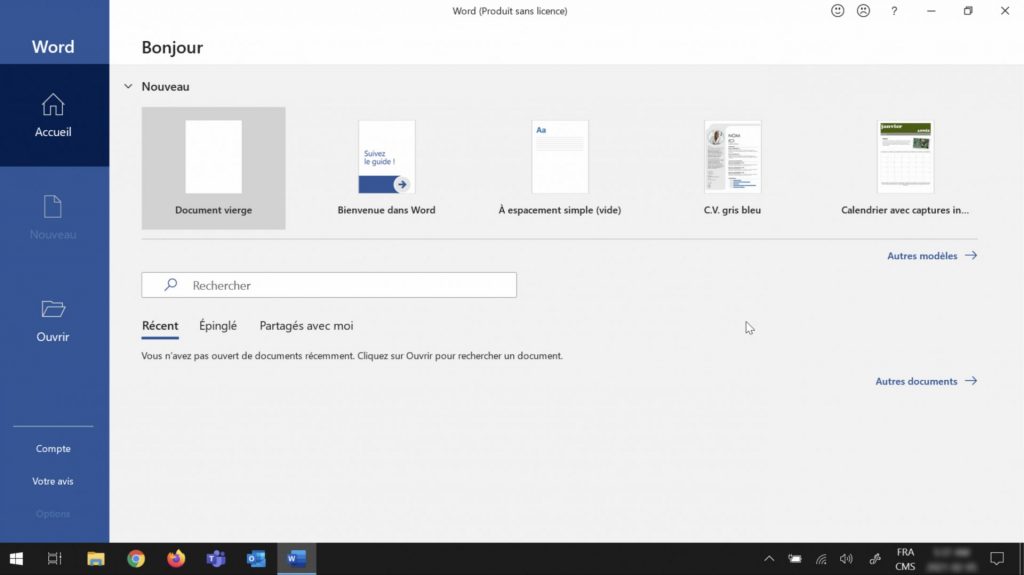
You are now ready to use your Microsoft 2016 Software.
