Sharing knowledge orally is central to Inuit ways of knowing, whether it is by learning from a knowledge holder, by listening to the community radio or simply by sharing stories with friends. Recording interviews using Audacity can be a powerful learning activity that taps into this tradition of oral transmission, allowing students to:
- learn from local knowledge holders;
- broadcast on the community radio;
- interview a specialist about an issue;
- share their own knowledge, learning or results;
- create a podcast on a subject of interest;
- and more…
This article explains how to prepare, conduct, edit and share interviews using the Audacity app available on all KI computers. It is a beginner resource, which means only the very basics of this tool are addressed.
Knowledge is constantly shared orally around you; at home with your family, in the community on the local radio, at school with your teacher and peers, or simply with your friends. Learning how to record interviews using Audacity can be a way for you to:
- learn from a knowledgeable person;
- broadcast on the community radio;
- share your own knowledge, learning or results;
- create a podcast on a subject of interest;
- etc.
🛠️ Tools used: Audacity recording module and cutting tool.
📚 Curricular links: Formulating questions, Listening, Oral communication, Storytelling.
📈 Level of difficulty: Beginner
Setting up for the Interview
1. Physical Setup
Before conducting an interview, consider location. Is there background noise? Are you likely to be interrupted? Is it echo? If outside, make sure to avoid windy locations. Here are a few tips to setup for your interview with your DELL Latitude computer.
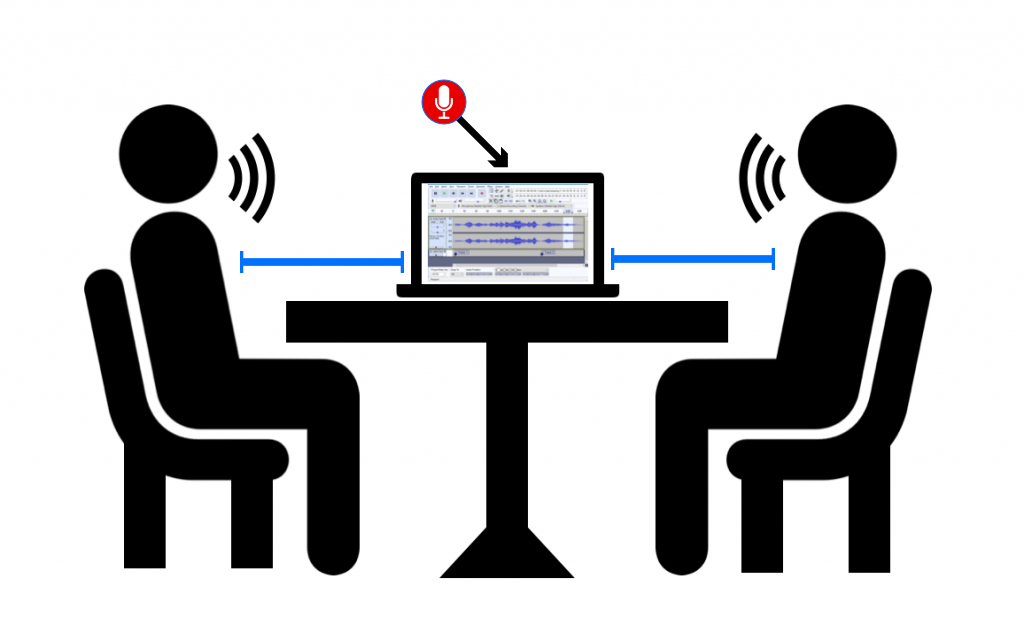
- Place the computer at an equal distance between the interviewer and the interviewee.
- Don’t speak too close, nor too far from the microphone. 50-100 cm is ideal.
- Place the computer sideways between the interviewe and interviewee, so that the microphone is not oriented towards one or the other person.
- Don’t place the computer on fabric, on your lap or on the couch, since these surfaces often create wrinkle sounds. A table is ideal.
2. Audacity Setup
Once your interview setup is ready, launch Audacity by double clicking on the icon on the desktop. Before beginning your interview, you should follow these steps to ensure your recording works well.
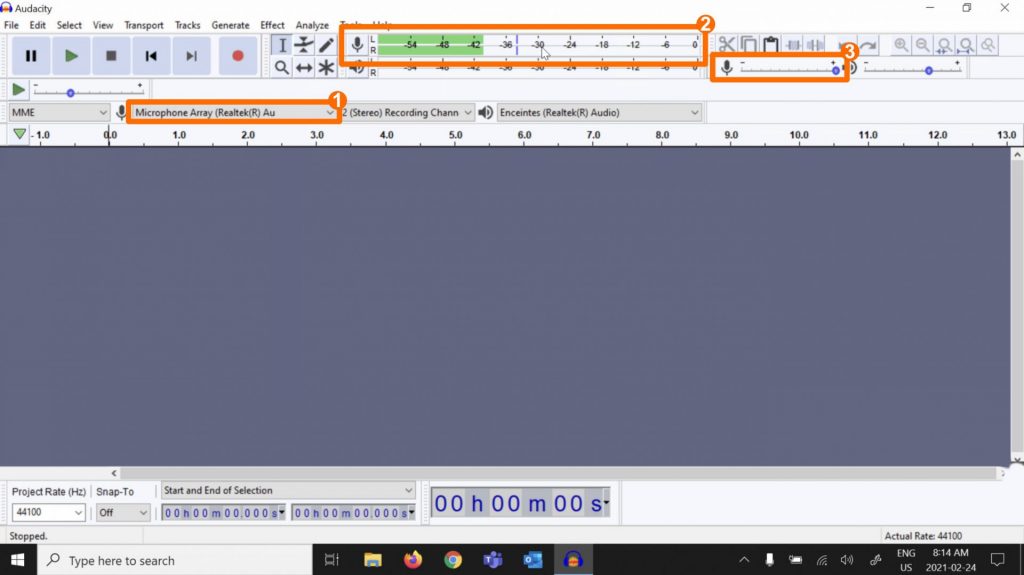
- Make sure Audacity is using your computer’s built-in microphone. It should be displayed as Microphone Array (Realtek…).
- Make sure the microphone works. Speak normally and see if the green volume lines are moving.
- Adjust the microphone volume so that when you speak normally, the green lines reach around -12 on the scale, without turning yellow or red.
Conducting the Interview
1. Recording the interview
During the interview, ask your questions slowly, and listen to the interviewee. Try avoiding verbal acknowledgements such as “humhum” because it can interrupt or interfere with your interviewee’s message. Try not to move too much, to avoid unwanted sounds made by cloths or moving chairs on your recording. If you or the interviewee makes a mistake, or wants to start over, don’t stop the recording. You can easily cut attempts or unwanted parts after the interview is recorded.
To start the recording:
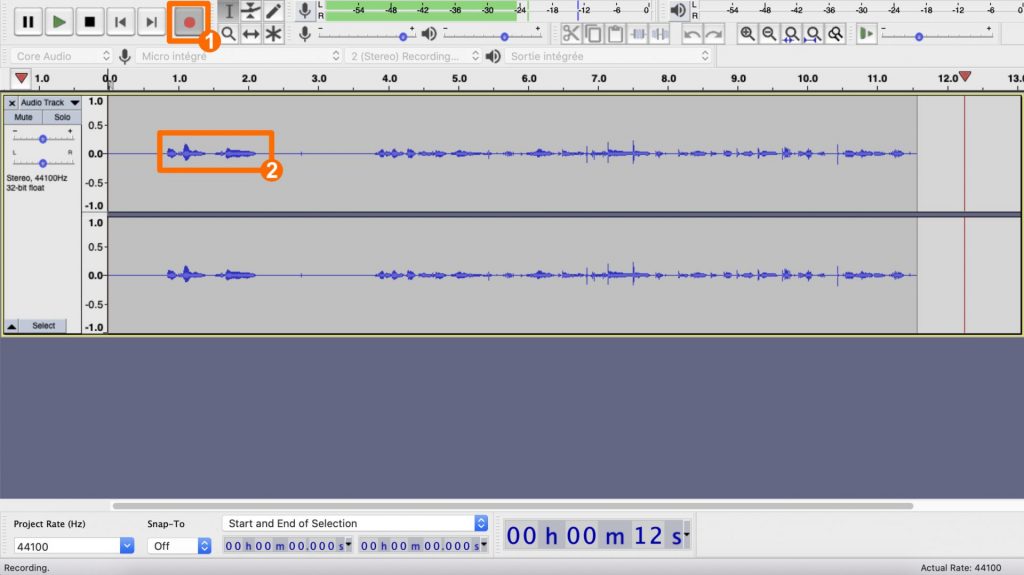
- Click on the record button (red circle).
- Start speaking and make sure you see sound peaks appear on the timeline. If the line is flat, you have a microphone problem.
To end the recording:
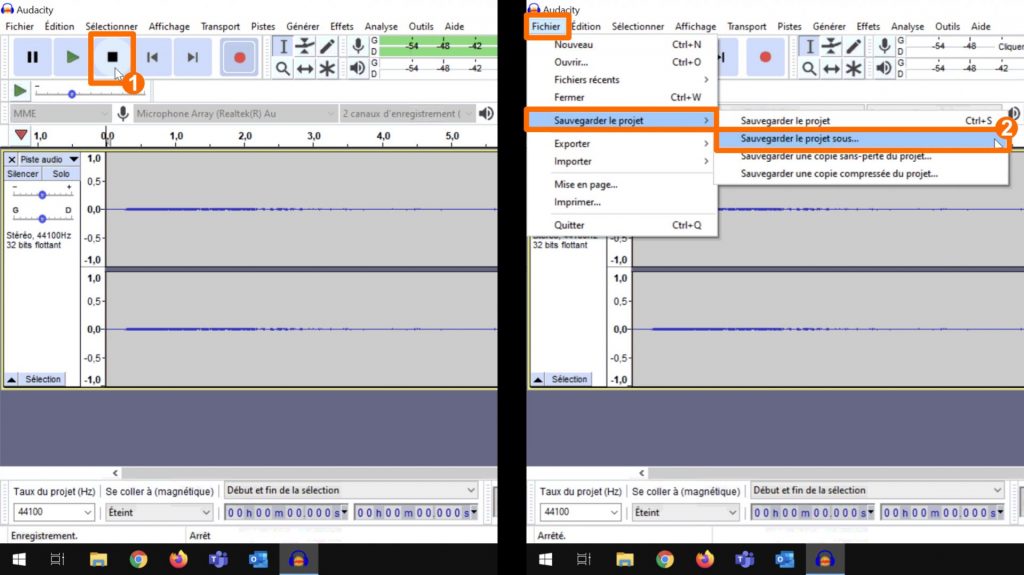
- Click on the stop button (square).
- To save your project, click on File > Save Project > Save project as…
- Choose the location where you would like to save your project. We suggest saving it in the Documents folder.
- Click on Save.
Editing the Interview
Once your interview is completed, you can listen and navigate through it using the controls in the upper left corner of the screen, or by clicking on the place you want to access in the recording timeline.
1. Removing a section of the interview.
During the interview, you or your interviewee might have made mistakes, paused for any reason, been disrupted by a sound or made multiple recordings of the same portion. These can all be corrected easily by cutting (removing) unwanted parts of the interview.
To cut (remove) a part of the Interview:
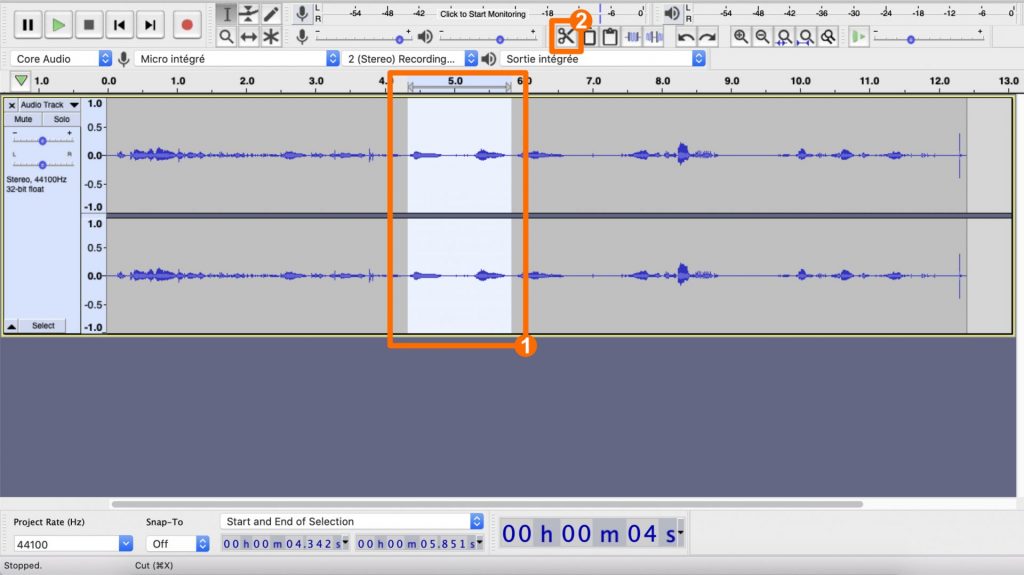
- Select the section of the interview you want to cut. In order to do so, click at the beginning of this section, hold your click and drag the cursor all the way to the end of the section to cut.
- Click on the cut (sissors) button. The selected part of the interview has disappeared.
Many more tools are available in Audacity to edit your interview. You can learn about them on the Audacity website.
Sharing the Interview
1. Exporting to MP3
Once you are satisfied with the result, share the audio file by exporting it to the MP3 format. This format will allow your audio file to be played on most devices and computers. To export:
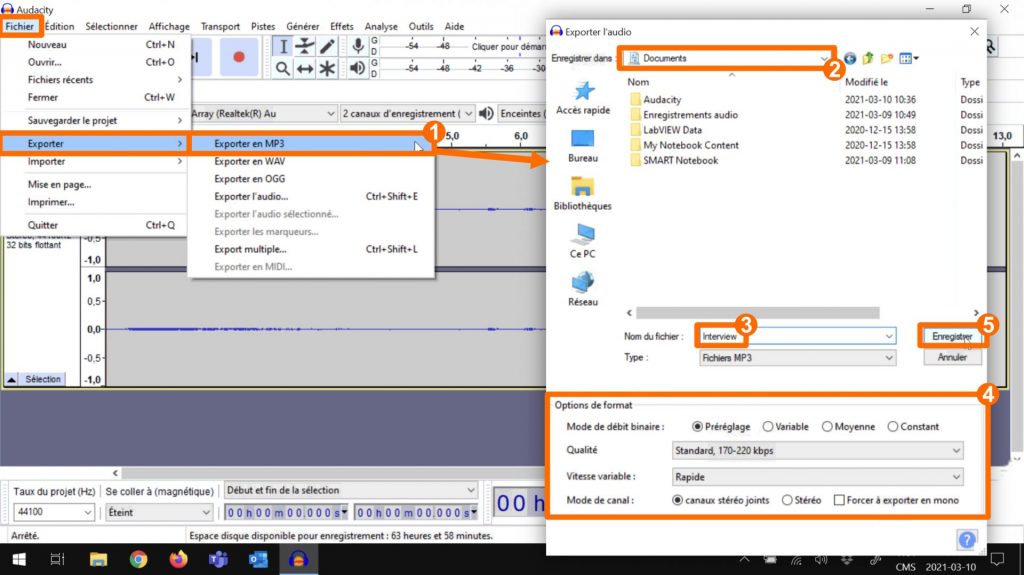
- Click on File > Export > Export as MP3.
- Choose the location where you would like to save your project. We suggest saving it in the Documents folder.
- Type in a name for your file.
- Ignore the settings. The default options are appropriate.
- Click on Save.
You can now share (with permission from the interviewee) your MP3 file by email, on a USB drive, take it to the local radio or post it on your social media.
